Much ado about scripting, Linux & Eclipse: card subject to change

2011-12-11

Build Nomenclature Conventions: What's in a name?

The following post is inspired by Mickael Istria's recent blog, Call a spade a spade, and a Nightly a Snapshot.

When I was doing builds for the Eclipse Modeling Project, I-builds were weekly published nightlies -- same level of stability as a SNAPSHOT (to use Maven parlance) or nightly, but published on a weekly schedule to bridge the gap between nightly/daily/SNAPSHOT/CI builds and the every-6-weeks milestone releases. The goal was to provide something stable enough for early adopters to grab once a week, but without the non-stop flux of nightlies. Regardless of the label on the build, the process was the same: tag CVS, then build using that tag.

The Final/GA/Release ("R") builds were done as simple renames of the last good milestone or release candidate build, so as to ensure binary-compatibility w/ the last-tested milestone/RC. The same was true for "M" and "S" builds -- they were just renamed "I" builds, and the letter was there simply to differentiate between a maintenance build (M), a stable milestone (S), or release (R).

Branching only happened when a release was done and it was time to produce the maintenance stream vs. the ongoing next-year-release. Sometimes branching would happen AFTER the x.y.1 maintenance because it saved duplication of commits in the x.y+1.0 and x.y.1 streams.

--

Now at JBoss, we publish "nightly" builds, which are keyed to SVN changes and therefore could be as often as hourly or as infrequent as weekly, depending on what's happening in the repo.

We also do milestone builds about once ever 6-8 weeks (similar to the Eclipse.org release train schedules), which is more carefully vetted, tested, and QE'd. It is produced using the same *process* as the nightlies, but are named differently and pulled from a freshly-created stable branch in the repo (so its degree of change/churn is less). (Branching happens right before every milestone or release candidate so that hardening/stabilization/documentation can happen in the branch while trunk stays open for new development.)

--

Bottom line -- I've only ever needed three types of builds, regardless of nomenclature or labelling differences. And of these 3, the last 2 are the same thing but renamed to underline the build quality/stability:

* nightly/CI/integration/weekly/SNAPSHOT build (unstable, for bleeding edge adopters)

* development milestone (probably a re-christened nightly; stable, early adopters)

* stable release / Final / GA (probably a re-christened milestone; release quality)

--

So... does it matter if it's called nightly, integration or SNAPSHOT? or Stable, Milestone, Maintenance, Final, GA or Release? As long as it's easily reproducible (yeah, Tycho!), what's in a name?

2011-11-09

HOWTO: Make KDE remember dual-monitor randr settings

Every time I boot up, KDE appears to forget that I want my monitors to be positioned left-to-right and instead defaults to mirrored config. But, after a lot of cursing and a little googling, I found an answer so it'll no so much keep your settings, but reset its broken config to your settings.

1. Hit ALT-F2, then enter "display" to run the Display Settings app.

2. Configure your settings as you'd like. Note that if the Apply button isn't active after your changes, you can change/revert something like a Position: button to make it active.

3. On restart, KDE may forget your dual-monitor settings. So, to prevent this, go look in your ~/.kde/share/config/krandrrc file:

[Display]
ApplyOnStartup=true
StartupCommands=xrandr --output "DVI-I-1" --pos 1920x0 --mode 1920x1200 --refresh 59.9502\nxrandr --output "HDMI-1" --pos 0x130 --mode 1920x1080 --refresh 60\nxrandr --noprimary

4. Copy the configuration into a new file, and replace \n with newlines. I like to put scripts like this in /etc/X11 because they relate to screen res and positioning.

# from ~/.kde/share/config/krandrrc
xrandr --output "DVI-I-1" --pos 1920x0 --mode 1920x1200 --refresh 59.9502 
xrandr --output "HDMI-1" --pos 0x130 --mode 1920x1080 --refresh 60 
xrandr --noprimary

5. Ensure the script is readable/executable for all users:

chmod 755 /etc/X11/1920x2.sh

6. Hit ALT-F2, then enter "autostart" to run the Autostart config tool.

7. Click Add script... and browse for the script you created above.

8. Reboot and watch the magic unfold.

2011-10-29

HOWTO: See what happened in SVN between builds

I was recently asked how to determine what changed between two builds. Jenkins provides nice interlinks into JIRA (issues), Fisheye (source changes), SVN (sources), but let's say you want to kick things a little more old school and investigate the old way... or the builds you want to compare are no longer shown in Jenkins because they expired and their metadata was automatically purged.

If you can't just look at the changelog in Jenkins to see what revision of source was used for the build, you can check the SVN log to find revision numbers based on the timestamp of the build.

So, if your build was generated on 2011-10-18, you can see that the log shows the last commit before that build was this:

$ svn log http://svn.jboss.org/repos/jbosstools/branches/jbosstools-3.2.x/

...

r35735 | bfitzpat | 2011-10-17 15:35:23 -0400 (Mon, 17 Oct 2011) | 2 lines
Changed paths:
   A esb/plugins/.project
   M esb/plugins/org.jboss.tools.esb.project.core/src/org/jboss/tools/esb/core/runtime/ESBRuntimeResolver_410.java

JBDS-1889 - Now checking for juddi-client-3.1.2.jar as well as 3.1.0 and 3.1.1 when seeing if the runtime includes ESB 4.10

...

Want to see actual diffs between that build and the latest one?

$ svn diff http://svn.jboss.org/repos/jbosstools/branches/jbosstools-3.2.x/@35735 http://svn.jboss.org/repos/jbosstools/branches/jbosstools-3.2.x/

Or, if you want to collect just the section of log relevant to the change:

$ svn log -r35735:HEAD http://svn.jboss.org/repos/jbosstools/branches/jbosstools-3.2.x/

Of course if you have all the sources locally, you don't need to log or diff via a URL - you can simply use local file paths. And if like me you use git-svn instead of pure svn, you can use that to diff or log too.

If you want to easily determine when a branch was created and get the SVN revision number for that branch point, use this:

# from r28571, returns -r28571:HEAD
rev=$(svn log --stop-on-copy \
  http://svn.jboss.org/repos/jbosstools/branches/jbosstools-3.2.x \
  | egrep "r[0-9]+" | tail -1 | sed -e "s#\(r[0-9]\+\).\+#-\1:HEAD#")

If you'd like to view a specific svn revision in your browser, use !svn/bc/REVISION_NUMBER/ before the branch and path to file or folder:

http://svn.jboss.org/repos/jbosstools/!svn/bc/35735/branches/jbosstools-3.2.x/

2011-10-26

HOWTO: Use Maven, Ant, and XSLT to scrub unwanted p2 metadata from an update site

Some time ago, I wrote about Using p2.inf to add/remove update sites. Tonight I found a simpler way to remove references in p2 metadata to external 3rd party sites.

For example, say you're repackaging some 3rd party features onto your own site, but don't want those features to provide references to the vendor's own update sites because you want to ensure that your product's site will only result in your sanctioned version being installed.

When you generate an update site, p2 pulls the information in the included features and will result in a section of references in the site's metadata that looks like this:

  <references size="6">
    <repository uri="http://download.eclipse.org/egit/updates" url="http://download.eclipse.org/egit/updates" type="0" options="0"/>
    <repository uri="http://subclipse.tigris.org/update_1.6.x" url="http://subclipse.tigris.org/update_1.6.x" type="1" options="0"/>
    <repository uri="http://download.eclipse.org/egit/updates" url="http://download.eclipse.org/egit/updates" type="1" options="0"/>
    <repository uri="http://subclipse.tigris.org/update_1.6.x" url="http://subclipse.tigris.org/update_1.6.x" type="0" options="0"/>
    <repository uri="http://eclipse.svnkit.com/1.3.x/" url="http://eclipse.svnkit.com/1.3.x/" type="0" options="0"/>
    <repository uri="http://eclipse.svnkit.com/1.3.x/" url="http://eclipse.svnkit.com/1.3.x/" type="1" options="0"/>
  </references>
To remove that, you can play with p2.inf directives, or you can simply perform an XSL transformation on the generated content.xml (inside content.jar, if your metadata is compressed) to remove the <references/> node:

<?xml version="1.0" encoding="UTF-8"?>
<xsl:stylesheet xmlns:xsl="http://www.w3.org/1999/XSL/Transform" version="2.0">
<xsl:template match="/">
        <xsl:apply-templates select="*"/>
</xsl:template>
<xsl:template match="*">
        <xsl:copy >
                <xsl:for-each select="@*">
                        <xsl:copy />
                </xsl:for-each>
                <xsl:apply-templates />
        </xsl:copy>
</xsl:template>
<xsl:template match="references" />
</xsl:stylesheet>
If you're generating your update site w/ Tycho, this transform can be called via a simple Ant script:

       <target name="remove.references">
                <!-- requires ant-contrib only if you like using if-then-else structures -->
                <if>
                        <available file="${update.site.source.dir}/content.jar" type="file" />
                        <then>
                                <unzip src="${update.site.source.dir}/content.jar" dest="${update.site.source.dir}" />
                                <delete file="${update.site.source.dir}/content.jar" />
                        </then>
                </if>
                <copy file="${update.site.source.dir}/content.xml" tofile="${update.site.source.dir}/content.old.xml" overwrite="true" />
                <xslt style="remove-references.xsl" in="${update.site.source.dir}/content.old.xml" out="${update.site.source.dir}/content.xml" />
                <zip destfile="${update.site.source.dir}/content.jar" basedir="${update.site.source.dir}" includes="content.xml" />
                <delete file="${update.site.source.dir}/content.xml" />
                <delete file="${update.site.source.dir}/content.old.xml" />
        </target>

Then, in your site's pom.xml, to call the Ant script, do this:

       <build>
                <plugins>
                        <plugin>
                                <groupId>org.apache.maven.plugins</groupId>
                                <artifactId>maven-antrun-plugin</artifactId>
                                <!-- make sure this variable is defined, eg., set to 1.3 -->
                                <version>${maven.antrun.plugin.version}</version>
                                <executions>
                                        <execution>
                                                <id>install</id>
                                                <phase>install</phase>
                                                <configuration>
                                                        <quiet>true</quiet>
                                                        <tasks>
                                                                <!-- called AFTER generating update site + zip to tweak content -->
                                                                <ant antfile="build.xml">
                                                                        <property name="SOME_ANT_VARIABLE" value="${SOME_MAVEN_VARIABLE}" />
                                                                </ant>
                                                        </tasks>
                                                </configuration>
                                                <goals>
                                                        <goal>run</goal>
                                                </goals>
                                        </execution>
                                </executions>
                                <dependencies>
                                        <!-- some dependencies your ant script might need -->
                                        <dependency>
                                                <groupId>commons-net</groupId>
                                                <artifactId>commons-net</artifactId>
                                                <version>1.4.1</version>
                                        </dependency>
                                        <dependency>
                                                <groupId>org.apache.ant</groupId>
                                                <artifactId>ant</artifactId>
                                                <version>1.7.1</version>
                                        </dependency>
                                        <dependency>
                                                <groupId>org.apache.ant</groupId>
                                                <artifactId>ant-nodeps</artifactId>
                                                <version>1.7.1</version>
                                        </dependency>
                                        <dependency>
                                                <groupId>org.apache.ant</groupId>
                                                <artifactId>ant-trax</artifactId>
                                                <version>1.7.1</version>
                                        </dependency>
                                        <dependency>
                                                <groupId>org.apache.ant</groupId>
                                                <artifactId>ant-commons-net</artifactId>
                                                <version>1.7.1</version>
                                        </dependency>
                                        <dependency>
                                                <groupId>org.apache.ant</groupId>
                                                <artifactId>ant-apache-regexp</artifactId>
                                                <version>1.7.1</version>
                                        </dependency>
                                        <dependency>
                                                <groupId>ant-contrib</groupId>
                                                <artifactId>ant-contrib</artifactId>
                                                <version>1.0b3</version>
                                        </dependency>
                                </dependencies>
                        </plugin>
                </plugins>
        </build>

I suppose there's probably a way to call a transform directly from Maven w/o the Ant wrapper, but this allows unpacking and repacking of the content.jar to get at the content.xml file.

2011-09-01

HOWTO: Move around between desktops & windows with keyboard or mouse

Recently installed Fedora 15 KDE spin, partly because the XFCE spins wouldn't boot from CD but also because I've heard less-than-favourable things about Gnome3 and because I'm addicted to Konqueror as a graphical sftp/scp/ssh viewer, so figured might as well use kdm instead of xfwm4 or gdm.

Still having some problems getting my 1600x1200 (or 1920x1200) monitor to do anything more than 1024x768 on the VGA port of the video card (works fine on the DisplayPort connector, either directly or via a DP-to-DVI cable, but not on the VGA connector, even with xorg.conf hackery). That said the options for display/monitor management under KDE are much better than under XFCE, and this is the first time I've been able to get two monitors working without HOURS of hacking away at xorg.conf scripts. So... big props for this release *almost* Just Working.

Workaround I'm trying next is to install a second video card. Will update when/if that solves the problem once it arrives.

But video resolution aside, I did recently figure out how to set keyboard bindings for moving windows between desktops (thanks to David Fisco). From the K-menu, select System Settings > Shortcuts and Gestures > Global Keyboard Shortcuts > KDE Component: KWin > "Window One Desktop To The Left/Right":

... and for switching between desktops ("Switch To Next/Previous Desktop")

Also recently discovered some fun options for switching between windows (on all desktops). From the K-menu, select System Settings > Desktop Effects > Enable desktop effects > Effect for window switching: Present Windows (or any of the other options).

There's also System Settings > Window Behavior > Task Switcher > Effect: Present Windows:

You might want to set an animation for switching between desktops, though I find with multiple monitors this can be a bit dizzying. From the K-menu, select System Settings > Workspace Behavior > Virtual Desktops > Switching > Animation: Desktop Cube Animation. For something more subtle, try "Fade Desktop".

Finally, you may want to set screen edge behaviours, such as making Present Windows appear when you cursor to the top-center of your screen. System Settings > Workspace Behavior > Screen Edges > right-click a target zone:

2011-08-16

Mounting Linux LVM drives

Because my Thinkpad X200 has finally, after just under 3 years, decided to give up the ghost via a FAN ERROR and refusal to start (POST beeps & auto-shutdown), I'm now faced with the task of recovering all the data on the drive (about 120G) across multiple partitions.

Here's the drive layout, as per cfdisk:

                                   cfdisk (util-linux-ng 2.17.2)

                                        Disk Drive: /dev/sdb
                                 Size: 160041885696 bytes, 160.0 GB
                       Heads: 255   Sectors per Track: 63   Cylinders: 19457

     Name           Flags         Part Type    FS Type              [Label]            Size (MB)
 --------------------------------------------------------------------------------------------------
     sdb1                          Primary     NTFS                 [^B]                26214.44   *
     sdb2           Boot           Primary     Linux ext3                                 209.72   *
                                   Logical     Free Space                                   3.68   *
     sdb5                          Logical     Linux ext3           [HOME]             106043.70   *
     sdb6           NC             Logical     Linux LVM                                20970.48   *
                                   Logical     Free Space                                   1.09   *
     sdb4                          Primary     Compaq diagnostics                        6595.71   *
                                               Unusable                                     0.49   *

So, under a Fedora 13 LiveCD, the /boot (sdb2) and /home (sdb5) partitions automounted, along with the WinXP (sdb1) partition. But the root partition (/, part of sdb6) would not as it's part of a LVM. After a quick burst of googling, I found this solution, which digests down to simply this:

yum install lvm2 -y; # install support for lvm2
pvscan # scan vol groups
vgchange vg_x2lappy -a y # mark your vol group active
lvscan # scan for logical volumes 
mkdir /media/sdb6 # create a mount point
mount /dev/vg_x2lappy/lv_root /media/sdb6/ # mount the lv
cd /media/sdb6/; ls -la # take off every zig!

2011-07-27

MANIFEST.MF and feature.xml versioning rules

I'm forever forgetting what the rules are for dependency declarations in MANIFEST.MF and feature.xml for osgi plugins and features. And Googling often results in frustration rather than an answer. So, because today I actually found a concise list of the rules, I thought I'd repost them here, with some minor edits to help clarify.

OSGi Plugin Version Ranges

Dependencies on bundles and packages have an associated version range which is specified using an interval notation: a square bracket “[” or “]” denotes an inclusive end of the range and a round bracket “(” or “)” denotes an exclusive end of the range. Where one end of the range is to be included and the other excluded, it is permitted to pair a round bracket with a square bracket. The examples below make this clear.

If a single version number is used where a version range is required this does not indicate a single version, but the range starting from that version and including all higher versions.

There are four common cases:

  • A “strict” version range, such as [1.2.3,1.2.3], which denotes that version and only that version.

  • A “half-open” range, such as [1.2.3,2.0.0), which has an inclusive lower limit and an exclusive upper limit, denoting version 1.2.3 and any version after this, up to, but not including, version 2.0.0.

  • An “unbounded” version range, such as 1.2.3, which denotes version 1.2.3 and all later versions.

  • No version range, which denotes any version will be acceptable. NOT RECOMMENDED.

The complete text of the above snippet can be seen here (or here as PDF).

Example:

Require-Bundle: org.eclipse.core.runtime;bundle-version="[3.4.0,4.0.0)",
 org.eclipse.core.resources;bundle-version="[3.4.0,4.0.0)",
 org.eclipse.ui.ide;bundle-version="[3.4.0,4.0.0)",
 org.eclipse.ui.navigator;bundle-version="3.5.100",
 com.ibm.icu

See also:


In terms of feature manifest (feature.xml) rules, help.eclipse.org has pretty good documentation, but the most important thing to remember - and what I often have to look up - is how to state the matching rules for required upstream features & plugins. Experience says it's always better to state things explicitly so there's no downstream guesswork needed and anyone reading your manifest knows EXACTLY what version(s) are required for or compatible with your feature. Plus, while YOU might be using PDE UI to build, someone else might be using Tycho and Maven, and every tool can interpret missing metadata their own way.

When in doubt, spell it out.

Valid values and processing are as follows:
  • if version attribute is not specified, the match attribute (if specified) is ignored.
  • perfect - dependent plug-in version must match exactly the specified version. If "patch" is "true", "perfect" is assumed and other values cannot be set. [1.2.3,1.2.3]
  • equivalent - dependent plug-in version must be at least at the version specified, or at a higher service level (major and minor version levels must equal the specified version). [1.2.3,1.3)
  • compatible - dependent plug-in version must be at least at the version specified, or at a higher service level or minor level (major version level must equal the specified version). [1.2.3,2.0)
  • greaterOrEqual - dependent plug-in version must be at least at the version specified, or at a higher service, minor or major level. 1.2.3
The complete text of the above snippet can be seen here.

Example:

<requires>
  <import feature="org.eclipse.m2e.feature" version="1.0.0" match="compatible"/>
  <import feature="org.maven.ide.eclipse.wtp.feature" version="0.13.0" match="greaterOrEqual"/>

  <plugin id="ch.qos.logback.classic" version="0.9.27.v20110224-1110" match="greaterOrEqual"/>
  <plugin id="ch.qos.logback.core" version="0.9.27.v20110224-1110" match="greaterOrEqual"/>
  <plugin id="ch.qos.logback.slf4j" version="0.9.27.v20110224-1110" match="greaterOrEqual"/>
  <plugin id="org.slf4j.api" version="1.6.1.v20100831-0715" match="compatible"/>
  <plugin id="com.ning.async-http-client" version="1.6.3.201106061504" match="equivalent"/>
  <plugin id="org.jboss.netty" version="3.2.4.Final-201106061504" match="perfect"/>
  <plugin id="org.hamcrest.core" version="1.1.0.v20090501071000" match="equivalent"/>
</requires>

2011-06-06

HOWTO: get xorg.conf to work w/ 1600x1200 res and an old Intel card

  1. Check your hardware spec, and determine how much memory your card has[1]:
    # lspci -vv | grep "Intel" -A7 | grep "VGA controller" -A7 | egrep "controller|Region"
    00:02.0 VGA compatible controller: Intel Corporation 82852/855GM Integrated Graphics Device (rev 02) (prog-if 00 [VGA controller])
     Region 0: Memory at e0000000 (32-bit, prefetchable) [size=128M]
     Region 1: Memory at d0000000 (32-bit, non-prefetchable) [size=512K]
  2. Use the above values to configure your /etc/X11/xorg.conf file - I suspect much of this is not needed, but here's what I have:
    Section "Device"
     Identifier "Intel"
     Option "AccelMethod" "UXA"
     VideoRam 130560
     #Driver      "intel"
     Driver      "vesa"
     VendorName  "Intel Corporation"
     BoardName   "82852/855GM Integrated Graphics Device"
     BusID       "PCI:0:2:0"
    EndSection
    
    Section "Monitor"
     Identifier "VGA"
     ModelName    "Sceptre 24"
            HorizSync    31 - 80
            VertRefresh  55 - 76
            Option      "DPMS" "true"
    EndSection
    
    Section "Screen"
     Identifier "Default Screen"
     Device "Intel"
     Monitor "VGA"
     DefaultDepth 16
            SubSection "Display"
                   Depth           16
                   Modes           "1920x1440_60" "1920x1200_60" "1920x1080_60" "1680x1050_59.883" "1360x768_59.8" "1600x1200_60" "1280x1024_60" "1024x768_60"
                   #Modes           "1920x1440" "1600x1200" "1280x1024" "1280x768"
            EndSubSection
    EndSection 
    
    Section "DRI"
            Mode         0666
    EndSection
    
    Section "Extensions"
            Option      "Composite" "Enable"
    EndSection
    
    Section "Module"
            Load  "dri"
    EndSection
  3. In /boot/grub/menu.lst, add the correct vga mode for 1600x1200 (vga=8). If you enter what you think is the correct mode based on this table, you'll be told it's wrong and can manually correct it, boot up, then fix the file & reboot.
    default=0
    timeout=5
    splashimage=(hd0,0)/grub/splash.xpm.gz
    
    
    title Fedora (2.6.34.7-56.fc13.i686)
     root (hd0,0)
     kernel /vmlinuz-2.6.34.7-56.fc13.i686 ro root=/dev/mapper/vg_xlappy-lv_root rd_LVM_LV=vg_xlappy/lv_root rd_LVM_LV=vg_xlappy/lv_swap rd_NO_LUKS rd_NO_MD rd_NO_DM LANG=en_US.UTF-8 SYSFONT=latarcyrheb-sun16 KEYBOARDTYPE=pc KEYTABLE=us rhgb quiet vga=8
     initrd /initramfs-2.6.34.7-56.fc13.i686.img
    
    title Fedora (2.6.34.7-56.fc13.i686) cmdline only, vga=8 = 1600x1200x16
     root (hd0,0)
     kernel /vmlinuz-2.6.34.7-56.fc13.i686 ro root=/dev/mapper/vg_xlappy-lv_root rd_LVM_LV=vg_xlappy/lv_root rd_LVM_LV=vg_xlappy/lv_swap rd_NO_LUKS rd_NO_MD rd_NO_DM LANG=en_US.UTF-8 SYSFONT=latarcyrheb-sun16 KEYBOARDTYPE=pc KEYTABLE=us init=3 init 3 vga=8
     initrd /initramfs-2.6.34.7-56.fc13.i686.img

See also:

2011-04-19

vim scripting: replacing timestamps

After weeks of manually updating compositeArtifacts.xml and compositeContent.xml files' timestamps using `date +%s000`, I finally snapped and went looking for a better way.

Using the Vim Tips wiki as inspiration, I cobbled together this keymapped string replacement function for use in Vim:

" add this to your ~/.vimrc file, then type '\ts' to update timestamp to current
fun! ReplaceTimestamp()
   let tstamp = strftime("%s000")
   exe ":%s#<property name='p2.timestamp' value='[0-9]\\+'/>#<property name='p2.timestamp' value='" . tstamp . "'/>#g"
   echo "New time: " . tstamp
endfun
nnoremap <Leader>ts :call ReplaceTimestamp()<CR>

2011-03-03

Git in colour

I've been using Git for a while now, but only today realized I can have coloured output for diff, grep, branch, show-branch and status, without having to hook in any other external tools (like colordiff, for example).

Here's my ~/.gitconfig file, which enables colour:

[user]
        name = Nick Boldt
        email = nickboldt (at) gmail.com

[giggle]
        main-window-maximized = false
        main-window-geometry = 1324x838+0+24
        main-window-view = HistoryView

[core]
        trustctime = false
        branch = auto
        diff = auto
        interactive = auto
        status = auto
        editor = vim

[merge]
        tool = vimdiff

[receive]
        denyCurrentBranch = warn

[branch]
        autosetuprebase = local

[color]
        ui = true
        diff = true
        grep = true
        branch = true
        showbranch = true
        status = true

[color "diff"]
        plain = normal dim
        meta = yellow dim
        frag = blue bold
        old = magenta
        new = cyan
        whitespace = red reverse

[color "status"]
        header = normal dim
        added = yellow
        untracked = magenta

[color "branch"]
        current = yellow reverse
        local = yellow
        remote = red

2011-02-16

Simplifying the p2 Process, Part 4: Using p2.inf to add/remove update sites

In Part 1 of this series, I looked at use of composite repos to provide a way of combining update sites into a single URL for ease of use and a single point of entry from which to do updates.

In Part 2, I discussed why we switched from using a collection of SDKs against which to build - using the now-deprecated brute-force "just unzip into eclipse root folder or dropins" approach - to using a single target platform update site so as to simplify maintenance and provide a reusable artifact for both build and workspace provisioning.

In Part 3, I looked at the idea of associating your repo with its upstream requirement sites, so that end-users need only use a single URL, rather than a half-dozen.


Finally, let's look at how you can use a p2.inf file to remove sites you don't support and add sites you do.

In JBDS 4, we include only two update sites - one for core features, and one for certified third-party extras, so that users will only get official updates from us, rather than from Spring, Eclipse, or anywhere else. Sure, they can manually add other URLs themselves, but that's a bit like pulling off the 'do not remove this tag' tag on a mattress or removing the 'warranty void if removed' sticker on your laptop.

So, first, we remove all the update site and discovery site URLs from our upstream features' feature.xml files, so they don't trickle down into the product.

Next, we use a p2.inf file:

# To explicitly remove a site, use instructions.unconfigure
instructions.configure=\
org.eclipse.equinox.p2.touchpoint.eclipse.addRepository(type:0,location:https${#58}//www.your.server.com/,name:Core Product Updates);\
org.eclipse.equinox.p2.touchpoint.eclipse.addRepository(type:1,location:https${#58}//www.your.server.com/,name:Core Product Updates);\
org.eclipse.equinox.p2.touchpoint.eclipse.addRepository(type:0,location:https${#58}//www.your.server.com/extras/,name:Extra Product Updates);\
org.eclipse.equinox.p2.touchpoint.eclipse.addRepository(type:1,location:https${#58}//www.your.server.com/extras/,name:Extra Product Updates);\
 

Then, to generate a site using that p2.inf instruction, here's a bit of Ant code:

<echo>Run p2.publisher.UpdateSitePublisher using launcherjar = @{launcherjar}</echo>
<java jar="@{launcherjar}"
      fork="true" timeout="10800000" jvm="${java.home}/bin/java" failonerror="true"
      maxmemory="256m" taskname="p2"
>
        <classpath>
                <fileset dir="${builder.build.path}/plugins"
                         includes="org.eclipse.equinox.launcher_*.jar, org.eclipse.equinox.p2.publisher_*.jar, org.eclipse.equinox.p2.updatesite_*.jar"
                />
                <fileset dir="${clean.eclipse.home}/plugins"
                         includes="org.eclipse.equinox.launcher_*.jar, org.eclipse.equinox.p2.publisher_*.jar, org.eclipse.equinox.p2.updatesite_*.jar"
                />
                <pathelement location="${builder.build.path}/plugins" />
                <pathelement location="${clean.eclipse.home}/plugins" />
        </classpath>
        <arg line=" org.eclipse.equinox.launcher.Main -consolelog -application org.eclipse.equinox.p2.publisher.UpdateSitePublisher"
        />
        <arg line=" -metadataRepository file:${updateSiteJarDir}/ -metadataRepositoryName "${update.site.product.name} ${update.site.description} Update Site""
        />
        <arg line=" -artifactRepository file:${updateSiteJarDir}/ -artifactRepositoryName "${update.site.product.name} ${update.site.description} Artifacts""
        />
        <arg line=" -source ${updateSiteJarDir}/" />
        <arg line=" -compress -publishArtifacts -reusePack200Files -configs *,*,*" />
</java>

Or, put your p2.inf file in the same directory as your build.properties ...

product=${builderDirectory}/jbds-all.product
runPackager=true

p2.gathering=true
p2.category.site=file:${builderDirectory}/site.xml
# locations.  Don't need a baseLocation, the transformedRepoLocation will have what we need
buildDirectory=${product.build.directory}/jbds-all-package
transformedRepoLocation=${product.build.directory}/jbds-all-package/transformed
repoBaseLocation=${product.build.directory}/jbds-all-package/toTransform

# The prefix that will be used in the generated archive.
archivePrefix=studio

# The location underwhich all of the build output will be collected.
collectingFolder=${archivePrefix}

# The list of {os, ws, arch} configurations to build.
configs = linux,gtk,x86 & win32,win32,x86 & linux,gtk,x86_64 & macosx,cocoa,x86 & macosx,cocoa,x86_64

buildId=${product.name}-product-${versionTag}
buildLabel=${buildId}

skipBase=true
skipMaps=true
skipFetch=true

... and your .product file ...

<?xml version="1.0" encoding="UTF-8"?>
<?pde version="3.5"?>

<product name="JBoss Developer Studio for Web and SOA Development" uid="com.jboss.jbds.all" id="com.jboss.jbds.product.product" application="org.eclipse.ui.ide.workbench" version="4.0.0.qualifier" useFeatures="true" includeLaunchers="true">

   <configIni use="default">
   </configIni>

   <launcherArgs>
      <programArgs>--launcher.XXMaxPermSize
256m
--launcher.defaultAction
openFile</programArgs>
      <vmArgs>-Xms512m
-Xmx1024m
-Dosgi.bundles=reference:file:org.eclipse.equinox.simpleconfigurator_1.0.200.v20100503.jar@1:start
-Dosgi.instance.area.default=@user.home/workspace</vmArgs>
      <vmArgsMac>-XstartOnFirstThread -Dorg.eclipse.swt.internal.carbon.smallFonts
-Xdock:icon=../Resources/JBDevStudio.icns</vmArgsMac>
   </launcherArgs>

   <windowImages/>

   <splash
      location="com.jboss.jbds.product" />
   <launcher name="jbdevstudio">
      <solaris/>
      <win useIco="true">
         <ico path="jbds.ico"/>
         <bmp/>
      </win>
   </launcher>

   <vm>
   </vm>

   <plugins>
   </plugins>

   <features>
      <feature id="com.jboss.jbds.product.feature" version="4.0.0.qualifier"/>
   </features>


</product>

... and when generating a product using PDE, that file and its instructions should be read at the correct time.

Hope this series has been helpful! If you have any examples of what you've done with .product or p2.inf files, please feel free to send me a link to your post or the file in your cvs, svn, or git repo. I'd love to see what else you can do with p2 and product builds.

See also:

2011-02-13

Simplifying The p2 Process, Part 3: Associate Sites

In Part 1 of this series, I looked at use of composite repos to provide a way of combining update sites into a single URL for ease of use and a single point of entry from which to do updates.

In Part 2, I discussed why we switched from using a collection of SDKs against which to build - using the now-deprecated brute-force "just unzip into eclipse root folder or dropins" approach - to using a single target platform update site so as to simplify maintenance and provide a reusable artifact for both build and workspace provisioning.


Now, let's look at the no-brainer that says that "less is more" when it comes to telling p2 from where to get updates, and that less effort for your user when installing is always a win.

If this sounds familar, I did blog about this briefly back in August. Since then, we've also added a quick XSLT script to remove the "Uncategorized" category that Tycho automatically adds for features which are listed in your site.xml but are not associated with a category. While this isn't strictly related to associate sites, it is about ease of use; while I applaud the desire to have everything belong to a category bucket (perhaps because the model Tycho's using requires it), the reason we'd rather hide these is to declutter the install view and not confuse people by suggesting features that won't work on their OS (eg., for which there's no XulRunner port).

But I digress...

Associate Sites

In the old days of yore, you could situate an associateSites.xml next to your site.xml in your "classic" update site, and Eclipse Update Manager would happily read that file and add those extra sites to your list of available update sites.

Then came p2, and while the old way still worked, it was no longer ideal. So, the new approach was to insert these associate sites directly into the p2 metadata for the site, content.xml and artifacts.xml (or content.jar and artifacts.jar).

This could be accomplished via a somewhat hacky appraoch - unpacking the existing metadata (content.jar) and shoehorning in the information at the bottom of the content.xml file, using an ant script (see "add.associate.sites" target, below) and a list of sites to be added:

<target name="add.associate.sites" if="associate.sites">
        <if>
                <and>
                        <!-- Defined in aggregateSite.properties -->
                        <isset property="associate.sites" />
                        <not>
                                <equals arg1="${associate.sites}" arg2="" />
                        </not>
                </and>
                <then>
                        <if>
                                <available file="${update.site.source.dir}/content.jar" type="file" />
                                <then>
                                        <unzip src="${update.site.source.dir}/content.jar" dest="${update.site.source.dir}" />
                                        <delete file="${update.site.source.dir}/content.jar" />
                                </then>
                        </if>
                        <!-- counter variable -->
                        <var name="associate.sites.0" value="" />
                        <for param="associate.site" list="${associate.sites}" delimiter=", 
">
                                <sequential>
                                        <var name="associate.sites.0" value="${associate.sites.0}00" />
                                </sequential>
                        </for>
                        <length property="associate.sites.length" string="${associate.sites.0}" />

                        <loadfile srcfile="${update.site.source.dir}/content.xml" property="content.xml">
                                <filterchain>
                                        <tailfilter lines="-1" skip="1" />
                                </filterchain>
                        </loadfile>
                        <echo file="${update.site.source.dir}/content.xml" message="${content.xml}" />
                        <echo file="${update.site.source.dir}/content.xml" append="true">  <references size='${associate.sites.length}'>
</echo>
                        <for param="associate.site" list="${associate.sites}" delimiter=", 
">
                                <sequential>
                                        <!-- insert into content.xml -->
                                        <echo file="${update.site.source.dir}/content.xml" append="true">    <repository uri='@{associate.site}' url='@{associate.site}' type='0' options='1'/>
<repository uri='@{associate.site}' url='@{associate.site}' type='1' options='1'/>
</echo>
                                </sequential>
                        </for>
                        <echo file="${update.site.source.dir}/content.xml" append="true">  </references>
</repository>
</echo>
          <!--  
    workaround for Tycho bug: uncategorized features in site.xml are put into
    "Uncategorized" category, rather than just being uncategorized (hidden) 
   -->
                 <copy file="${update.site.source.dir}/content.xml" tofile="${update.site.source.dir}/content.old.xml" overwrite="true" />
                        <xslt style="remove-uncategorized.xsl" in="${update.site.source.dir}/content.old.xml" out="${update.site.source.dir}/content.xml" />
                        <zip destfile="${update.site.source.dir}/content.jar" basedir="${update.site.source.dir}" includes="content.xml" />
                        <delete file="${update.site.source.dir}/content.xml" />
                        <delete file="${update.site.source.dir}/content.old.xml" />
                </then>
        </if>
</target>

So, now, instead of telling people to add multiple update sites to resolve missing potentially dependencies when installing, we can cause those extra sites to be automatically added at the same time they add the single URL for JBoss Tools. Now the additional sites need only be listed for reference, but no additional effort is required by the user.

BONUS HACK: to force a site that may already be listed (but disabled) to be added again, and this time definitely be enabled, you can add an extra slash into URL. Thus http://download.eclipse.org/birt/update-site/2.6 becomes http://download.eclipse.org//birt/update-site/2.6/, and as p2 sees a new site, it adds the new site (instead of ignoring it because it's already present but disabled. Again, a win.

Alternatively, you could cast an arcane spell using a p2.inf file in your feature's root folder or plugin's META-INF/ folder to add these additional, required sites... or do whatever processing you might need. I'm not sure if Tycho supports this yet, or how fully PDE supports reading this information. Got sample code? Send it to me as a comment below or via twitter to @nickboldt. Thanks!


In part 4, I'll talk a little about how to prevent your product build from getting updates from unofficial sources, and preload your product with the official sites from which to get updates. Because it's important to balance ease of use with prevention of unsupported features. SPOILER ALERT: may contain p2.inf instructions.

2011-02-09

Simplifying The p2 Process, Part 2: Target Platform Repos

In Part 1 of this series, I looked at use of composite repos to provide a way of combining update sites into a single URL for ease of use and a single point of entry from which to do updates.

Defining a Target

Now, I'd like to talk about how to escape the proliferation of zips needed to establish a target platform. For those unfamiliar with the term "target platform", it's either the installed base against which you're compiling your code, or it's the collection of things you have to install first before you can install something on top of that.

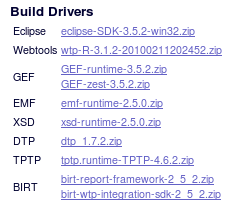
For the JBoss Tools case, we have at least 8 prereqs for installation. Here's what you had to install prior to JBoss Tools 3.1.1:

Now, admittedly, because there is also the Ganymede update site, you don't necessarily need to download and unpack all these zips in order to install JBoss Tools - instead, you need only enable the Ganymede site. (Same story for Helios and JBoss Tools 3.2.)

However, to do a reproduceable PDE-based build, you still need to create this base install. Traditionally, PDE's approach was to download and unpack these zips into the root of the Eclipse install running the build. Athena attempted to improve on this situation by allowing you to define a list of update sites and IUs (features and/or plugins) which were needed to define the platform. But it was far from portable, and hardly reusable.

Buckminster (later b3) also approached this problem by creating its own markup for defining what sites and what IUs to install, backed by an EMF model. But rather than dealing with a UI to create the model and populate it, I found it more useful to simply generate an instance of the aggregator model and then use the aggregator to fetch & install IUs. But as the aggregator is simply a wrapper for the underlying p2.mirror and p2.director tasks, you can use those directly too.

But as they say... "Don't bore us, get to the chorus!" So, here's some sample code for the various solutions for build-time provisioning.

  1. Using the buckminster aggregator (properties file) - stopped working for us w/ Eclipse 3.6, so we switched to b3

  2. Using the b3 aggregator (properties file) - stopped worked consistently due to network timeouts resolving deps & fetching IUs.

  3. Using p2.mirror - underlying p2 ant task for mirroring from one or more repos to local disk

  4. Using p2.director - underlying p2 ant task for installing IUs (from local or remote repo) into some target Eclipse

So, with these tools, you could create a p2 repo from other repos - mirroring and installing IUs as needed - and even script an installation. But was there a better way?

Target Platform Definition File

Enter the target platform definition file (.target). This file contains a list of IUs and the p2 repos from which to provision them. So, it's like a b3 aggregator model, or an Athena build.properties file, but abstracted away from the concept of a build, because it can be used for building but ALSO for provisioning a user's installed Eclipse base.

Unfortunately, the Target Platform Definition File editor in Eclipse 3.6 is less than optimal for large targets, or when your internet connection is suboptimal. So, after fighting with it for a while, filing bugs, and ultimately giving up, I went back to my handy-dandy XML editor (often just vim) to maintain it more simply. So rather than having Eclipse automatically install things based on a .target file, I revert to a workflow that actually works: installing by hand from an update site.

While Buckminster does support .target files (or so I've read), I didn't want to be dependent on it any more, preferring a more "pure" solution.

So, based on code from Peter Nehrer (@pnehrer), I then wrote an XSL transform to create a p2.mirror script from a .target file, wrapped with another Ant script (and optionally, a Maven pom.xml script).

And why might you care? Well, this .target file can be used to:

  • Provision a developer's Eclipse, using the Target Platform Definition Editor and a few clicks (when it doesn't time out)
  • Provision a developer's Eclipse via script for offline or multiple users (getting the team up to speed)

And yes, much (or all) of the above can be done w/ Buckminster and/or b3, if you like that approach.

But I prefer to create the .target as input to a build process, rather than being explicitly tied to one. So, as I noted above, if you have a .target file, you can easily generate a p2 repo, and use that repo to run downstream builds. Now, instead of having a half-dozen zips to download and unpack with every build (using the deprecated and unsupported "dropins" method) you can use a fully-p2-friendly repo site which contains everything you need to do your builds - whether you're a Hudson server or a developer working at home or offline.

Benefits

  • Unlike "a collection of zips" this single-source-site can be versioned with each release.

  • It only contains WHAT YOU ACTUALLY NEED rather than extraneous sources and doc and tangential plugins/features you don't. It's a bit like making muffins by first grinding your own flour, but at least you know there's nothing evil in that muffin mix, and you will be able to consistently reproduce the recipe every time, regardless of where you might be on teh interwebz.

  • f you're a keener / beta tester who likes to build against the latest milestone (or even a weekly integration build) of Eclipse 3.next or 4.future, you can use the script above to self-update. So, while the TP itself is a contained snapshot listing the explicit versions of feature groups needed, it can also be run in "get the latest available" mode in order to keep your TP current against some HEAD or trunk development / releases.

  • By splitting the TP out of the build, you can build it upstream. So, where in the past we had one "uberbuild" and an implied TP therein, now we have a TP build job, and it is then shared by the 34 downstream jobs which depend on it for their dependencies.

Shut up and show me the code!

# for the "foo.target" file, build a local target platform repo, fetching the latest versions and updating the .target file
$ ant -f build.xml -DtargetFile=foo.target -DuseLatest=true

# for the "bar.target" file, build a local target platform repo, but fetch only the stated versions of IUs
$ ant -f build.xml -DtargetFile=bar.target -DuseLatest=false

That's it. I also wrap the build.xml ant script w/ a pom which allows it to be called from an upstream Maven/Tycho process, but that's nothing more than just calling the script using the antrun plugin (and a few ant dependencies), like this:

<build>
        <plugins>
                <plugin>
                        <groupId>org.apache.maven.plugins</groupId>
                        <artifactId>maven-antrun-plugin</artifactId>
                        <version>1.6</version>
                        <executions>
                                <execution>
                                        <phase>validate</phase>
                                        <configuration>
                                                <tasks>
                                                        <ant antfile="build.xml">
                                                                <property name="targetFile" value="multiple.target" />
                                                                <!-- <property name="repoDir" value="/path/to/where/to/provision/repo"/> -->
                                                        </ant>
                                                </tasks>
                                        </configuration>
                                        <goals>
                                                <goal>run</goal>
                                        </goals>
                                </execution>
                     </executions>
                        <dependencies>
                                <dependency>
                                        <groupId>commons-net</groupId>
                                        <artifactId>commons-net</artifactId>
                                        <version>1.4.1</version>
                                </dependency>
                                <dependency>
                                        <groupId>org.apache.ant</groupId>
                                        <artifactId>ant-commons-net</artifactId>
                                        <version>1.7.1</version>
                                </dependency>
                                <dependency>
                                        <groupId>org.apache.ant</groupId>
                                        <artifactId>ant-trax</artifactId>
                                        <version>1.7.1</version>
                                </dependency>
                        </dependencies>
                </plugin>
 </plugins>
</build>

The rest of the code is here.


In part 3, I'll look back at the success we've had using associate sites instead of asking people to manually add 3rd party URLs when installing JBoss Tools. SPOILER ALERT: one URL is easier for people to use than 6.

In part 4, I'll talk a little about how to prevent your product build from getting updates from unofficial sources, and preload your product with the official sites from which to get updates. Because it's important to balance ease of use with prevention of unsupported features. SPOILER ALERT: may contain p2.inf instructions.

2011-02-02

Visualizing OSGi Dependencies

Yesterday I blogged about how to find dependencies in features on plugins or features using a shell script to rip through feature jars.

But maybe you're less commandline, and more visual? Well, it may be over three years old, but there's a way to visualize plugin interdependencies using Ian Bull's PDE Dependency View. Frankly, I'm amazed this isn't already a core feature in PDE (and correct me if it is).

To use this tool, simply install it from:

http://download.eclipse.org/eclipse/pde/incubator/visualization/site

After installing and restarting, hit CTRL-3 and type "Graph" to find the "Graph Plug-In Dependencies View". (It's also available from Window > Show View > Other... (ALT-SHIFT-Q,Q) under Plug-in Development, if you prefer to kick it old-school.)

Next, right-click in the view or hit the "Focus on" button in the view, and select the plugin on which you want to focus.

Now you can browse up or down through plugins to explore dependencies.

For example, to see what plugins depend on a given plugin, such as org.eclipse.tm.terminal, click the "Show Callers" button in the view.

Or, to see on which plugins org.jboss.ide.eclipe.as.rse.ui depends, click the "Show Callees" button in the view. You can shift-click on nodes to highlight them for emphasis, or click and drag them around.

2011-02-01

Syntax highlighting for code snippets in blogs

Where does he get those wonderful toys? - The Joker, Batman (1989)
Recently I was asked how I make code snippets on this blog prettier. Here's how.
  1. In your blog's template, install Alex Gorbatchev's Syntax Highlighter.
  2. Then, in the body of the blog post (with all occurrences of "<" HTML-escaped as "&lt"):
    <pre class="brush:shell"> ... </pre>
    or
    <pre class="brush:java"> ... </pre>
    or
    <pre class="brush:xml"> ... </pre>
  3. There are other "brushes" available too with which you can "paint" your code. I generally only need java, xml, and shell.

HOWTO: Find osgi dependencies in features

Say you're trying to build something with Tycho & Maven 3 and while resolving dependencies before compilation, you're told:

[INFO] [Software being installed: 
  org.eclipse.tm.terminal.local.feature.group 0.1.0.v201006041240-10-7w312117152433, 
  Missing requirement: 
    org.eclipse.tm.terminal.local 0.1.0.v201006041322 
      requires 
        'bundle org.eclipse.cdt.core 5.2.0' 
          but it could not be found, 
  Cannot satisfy dependency: 
    org.eclipse.tm.terminal.local.feature.group 0.1.0.v201006041240-10-7w312117152433 
      depends on: 
        org.eclipse.tm.terminal.local [0.1.0.v201006041322]]

To quickly verify where this dependency is coming from, you can go look into the feature.xml for the org.eclipse.tm.terminal.local feature jar... but if you don't have it installed, this is somewhat more cumbersome; besides, you then have to unpack the jar before you can look inside it.

And maybe that feature contains a number of OTHER dependencies that you'll also need to resolve in your target platform when building. Sure, there are UI tools to do this within Eclipse, but when you're working on remote servers sometimes UI isn't available.

Workaround? Assuming you have a mirror of the update site(s) from which you're trying to resolve the dependency (eg., Helios) or can ssh to dev.eclipse.org, you can simply run a quick shell script to do the investigative work for you:

$ cd ~/downloads/releases/helios/201009240900/aggregate/; ~/bin/findDepInFeature "*tm*" cdt

./features/org.eclipse.tm.terminal.local_0.1.0.v201006041240-10-7w312117152433.jar
      <import feature="org.eclipse.cdt.platform" version="7.0.0" match="greaterOrEqual"/>
      <import plugin="org.eclipse.cdt.core" version="5.2.0" match="compatible"/>
      <import plugin="org.eclipse.core.runtime"/>
Where the script looks like this:
#!/bin/bash
# find plugins/feature deps by searching in some folder for feature jars, and searching through their feature.xml files for dependencies

# 1 - featurePattern - pattern of features to search (eg., "org.eclipse.tptp" or "\*" for all features)
# 2 - dependencyPattern  - pattern of plugins/feature deps for which to search (eg., "org.eclipse.tptp.platform.instrumentation.ui")
# 3 - location       - directory in which to search, if not "."

if [[ ! $1 ]]; then
        echo "Usage: $0 <featurePattern> <dependencyPattern> <location>"
        echo ""
        echo "Example: $0 tm.terminal cdt"
        exit 1
fi

# if no location, look in current dir (.)
if [[ $3 ]]; then location="$3"; else location="."; fi

# if no featurePattern, search all features for dependencyPattern
if [[ ! $2 ]]; then featurePattern="*"; dependencyPattern="$1"; else dependencyPattern="$2"; featurePattern="$1"; fi

rm -fr /tmp/findinfeature/; mkdir -p /tmp/findinfeature/features/
for f in $(find "$location" -type f -name "*${featurePattern}*" | egrep -v "pack.gz|source" | grep features | egrep "${featurePattern}"); do
        #echo "$f [$featurePattern, $dependencyPattern]"
        unzip -q $f -d /tmp/findinfeature/ feature.xml
        #       <import feature="org.eclipse.cdt.platform" version="7.0.0" match="greaterOrEqual"/>
        #       <import plugin="org.eclipse.cdt.core" version="5.2.0" match="compatible"/>
        if [[ ! $(cat /tmp/findinfeature/feature.xml | egrep "<import" -A3 | egrep "plugin=|feature=" -A1 -B1 | egrep "\".*${dependencyPattern}[^\"]*\"" -A1 -B1) ]]; then
                rm -fr /tmp/findinfeature/feature.xml
        else
                mv /tmp/findinfeature/feature.xml /tmp/findinfeature/${f}_feature.xml
                echo "${f}"
                cat /tmp/findinfeature/${f}_feature.xml | egrep "<import" -A3 | egrep "plugin=|feature=" -A1 -B1 | egrep "\".*${dependencyPattern}[^\"]*\"" -A1 -B1
                echo ""
        fi
        rm -fr /tmp/findinfeature/feature.xml
done

2011-01-29

Simplifying The p2 Process, Part 1: p2 Composite Repos

With the release of JBoss Tools 3.2 and JBoss Developer Studio 4.0 just around the corner, you may be thinking to yourself, "Self, how many update sites and SDK zips and runtimes will I need to download THIS time?"

Or maybe you're thinking, "Self, why is this so damn complicated?"

Well, folks, we heard your kvetching and we did something about it.

Composite Repos

While this is not a new concept to many, we embraced the composite update site this past year and it's made life a lot easier for iterative, agile development cycles. Last year, JBoss Tools 3.1 was built as a single Hudson job, with a second one for JBoss Developer Studio. This meant that any change in any of the components would cause a build to be launched, and 4-6hrs later, we'd have fresh bits. Yeah, far from ideal.

This year, we split up the monolith (and added a few new components!) so that now we have 34 update sites to compose into a single one against which builds can then be built. This composite update site looks like this:

compositeArtifacts.xml

<?xml version='1.0' encoding='UTF-8'?>
<?compositeArtifactRepository version='1.0.0'?>
<repository name='JBoss Tools Staging Repository' 
  type='org.eclipse.equinox.internal.p2.artifact.repository.CompositeArtifactRepository' 
  version='1.0.0'>
<properties size='2'>
<property name='p2.compressed' value='true'/>
<!-- get new time w/ `date +%s000` -->
<property name='p2.timestamp' value='1294205433000'/>
</properties>
<children size='34'>
<child location='http://download.jboss.org/jbosstools/builds/staging/jbosstools-3.2_trunk.component--archives/all/repo/'/>
...
<child location='http://download.jboss.org/jbosstools/builds/staging/jbosstools-3.2_trunk.component--ws/all/repo/'/>
<child location='http://download.jboss.org/jbosstools/builds/staging/jbosstools-pi4soa-3.1_trunk/all/repo/'/>
<child location='http://download.jboss.org/jbosstools/builds/staging/jbosstools-teiid-designer-7.1_trunk/all/repo/'/>
<child location='http://download.jboss.org/jbosstools/builds/staging/jbosstools-drools-5.2_trunk/all/repo/'/>
<child location='http://download.jboss.org/jbosstools/builds/staging/jbosstools-savara-1.1_trunk/tools/'/>
<child location='http://download.jboss.org/jbosstools/builds/staging/xulrunner-1.9.1.2/all/repo/'/>
</children>
</repository>

compositeContent.xml

<?xml version='1.0' encoding='UTF-8'?>
<?compositeMetadataRepository version='1.0.0'?>
<repository name='JBoss Tools Staging Repository' 
  type='org.eclipse.equinox.internal.p2.metadata.repository.CompositeMetadataRepository' 
  version='1.0.0'>
<properties size='2'>
<property name='p2.compressed' value='true'/>
<!-- get new time w/ `date +%s000` -->
<property name='p2.timestamp' value='1294205433000'/>
</properties>
<children size='34'>
<child location='http://download.jboss.org/jbosstools/builds/staging/jbosstools-3.2_trunk.component--archives/all/repo/'/>
...
<child location='http://download.jboss.org/jbosstools/builds/staging/jbosstools-3.2_trunk.component--ws/all/repo/'/>
<child location='http://download.jboss.org/jbosstools/builds/staging/jbosstools-pi4soa-3.1_trunk/all/repo/'/>
<child location='http://download.jboss.org/jbosstools/builds/staging/jbosstools-teiid-designer-7.1_trunk/all/repo/'/>
<child location='http://download.jboss.org/jbosstools/builds/staging/jbosstools-drools-5.2_trunk/all/repo/'/>
<child location='http://download.jboss.org/jbosstools/builds/staging/jbosstools-savara-1.1_trunk/tools/'/>
<child location='http://download.jboss.org/jbosstools/builds/staging/xulrunner-1.9.1.2/all/repo/'/>
</children>
</repository>

So, now that JBoss Tools is built in 34 pieces, the bits that haven't changed aren't rebuilt over and over and builds are faster. If that sounds insanely obvious to you, well, we used to have a lot of inter-component cyclic dependencies. We eliminated those early in the development cycle for JBoss Tools 3.2, and have been able to build smarter and faster ever since.

Added benefits to this composite site are:

  • Newly built and published bits are instantly available from the composite site - sure, the same was true under last year's PDE "uberbuild" regime, but that's because everything was built fresh every time, which was slow and near-impossible to get people to run at home.

  • Developers can use this site to install latest updates to components they're interested in testing - again, this was true before; but now using the same site and searching for updates, developers and beta testers can get incremental updates to the components that have actually changed, rather than having to pull down 160M every day to get a few K of changes.

  • Tycho can be pointed at this site (see below) in order to resolve binary p2 dependencies, so building a component deep in the dependency chain can be done w/o having to first build its upstream dependencies - this wasn't a concern before because everything was built from source every time, so by definition everything was already on disk. But now, if a developer only cares about a single component, like ModeShape or GWT, they need only have that source (and some bootstrapping code) on disk. Smaller, faster, more agile. And way more likely to be built locally before checking in code than before, making the painful "who broke what and when?" process much less painful. Fewer moving pieces and local dev builds at home mean - in theory - fewer incomplete or breaking commits.

When we first moved to Tycho, we needed to build a series of components locally in order to just get to a deep component. For example, the Struts component needs VPE, which needs JST and XulRunner. JST also needs the Common component, which in turn needs the Tests component.

So, to build Struts locally, 5 other components would have to be built locally first. This worked, but was still a fairly large barrier to entry for most developers (much less contributors!)

But with this new composite site, building Struts can be done without this lengthy bootstrapping; instead we just point Tycho at this composite site, and it pulls down the 5 upstream components' jars from this p2 repo - because the upstream deps are already built in Hudson.

Here's what we added to our parent pom.xml to have the builds find the binaries:

<repository>
        <id>jbosstools-nightly-staging-composite-trunk</id>
        <url>http://path.to.the.site/staging/_composite_/trunk/ </url>
        <layout>p2</layout>
        <snapshots>
                <enabled>true</enabled>
        </snapshots>
        <releases>
                <enabled>true</enabled>
        </releases>
</repository>

So, using this composite update site, we can use Maven 3 with Tycho 0.10 to generate a single update site (staged here, then ultimately published here).


In part 2, I'll look at why we switched from using a collection of SDKs (Eclipse, EMF, DTP, GEF, M2E, RSE, TPTP, UMl2, WTP, XSD and more) against which to build - using the now-deprecated brute-force "just unzip into eclipse root folder or dropins" approach - to using a single target platform update site. SPOILER ALERT: Easier to update and maintain.

In part 3, I'll look back at the success we've had using associate sites instead of asking people to manually add 3rd party URLs when installing JBoss Tools. SPOILER ALERT: one URL is easier for people to use than 6.

In part 4, I'll talk a little about how to prevent your product build from getting updates from unofficial sources, and preload your product with the official sites from which to get updates. Because it's important to balance ease of use with prevention of unsupported features. SPOILER ALERT: may contain p2.inf instructions.

By the way, JBoss Tools 3.2.0.CR1 and JBoss Developer Studio 4.0.0.CR1 are available. Get 'em while they're hot (and sourceforge is not).

2011-01-27

HOWTO: partially clone an SVN repo to Git, and work with branches

Skip to the code

I've blogged a few times now about Git (which I pronounce with a hard 'g' a la "get", as it's supposed to be named for Linus Torvalds, a self-described git, but which I've also heard called pronounced with a soft 'g' like "jet"). Either way, I'm finding it way more efficient and less painful than either CVS or SVN combined.

So, to continue this series ([1], [2], [3]), here is how (and why) to pull an SVN repo down as a Git repo, but with the omission of old (irrelevant) revisions and branches.

Using SVN for SVN repos

In days of yore when working with the JBoss Tools and JBoss Developer Studio SVN repos, I would keep a copy of everything in trunk on disk, plus the current active branch (most recent milestone or stable branch maintenance). With all the SVN metadata, this would eat up substantial amounts of disk space but still require network access to pull any old history of files. The two repos were about 2G of space on disk, for each branch. Sure, there's tooling to be able to diff and merge between branches w/o having both branches physically checked out, but nothing beats the ability to place two folders side by side OFFLINE for deep comparisons. So, at times, I would burn as much as 6-8G of disk simply to have a few branches of source for comparison and merging. With my painfullly slow IDE drive, this would grind my machine to a halt, especially when doing any SVN operation or counting files / disk usage.

Using Git for SVN repos naively

Recently, I started using git-svn to pull the whole JBDS repo into a local Git repo, but it was slow to create and still unwieldy. And the JBoss Tools repo was too large to even create as a Git repo - the operation would run out of memory while processing old revisions of code to play forward.

At this point, I was stuck having individual Git repos for each JBoss Tools component (major source folder) in SVN: archives, as, birt, bpel, build, etc. It worked, but replicating it when I needed to create a matching repo-collection for a branch was painful and time-consuming. As well, all the old revision information was eating even more disk than before:

  • jbosstools' trunk as multiple git-svn clones: 6.1G
  • devstudio's trunk as single git-svn clone: 1.3G

So, now, instead of a couple Gb per branch, I was at nearly 4x as much disk usage. But at least I could work offline and not deal w/ network-intense activity just to check history or commit a change. Still, far from ideal.

Cloning SVN with standard layout & partial history

This past week, I discovered two ways to make the git-svn experience at least an order of magnitude better:

  1. Standard layout (-s) - this allows your generated Git repo to contain the usual trunk, branches/* and tags/* layout that's present in the source SVN repo. This is a win because it means your repo will contain the branch information so you can easily switch between branches within the same repo on disk. No more remote network access needed!
  2. Revision filter (-r) - this allows your generated Git repo to start from a known revision number instead of starting at its birth. Now instead of taking hours to generate, you can get a repo in minutes by excluding irrelevant (ancient) revisions.

So, why is this cool? Because now, instead of having 2G of source+metadata to copy when I want to do a local comparison between branches, the size on disk is merely:

  • jbosstools' trunk as single git-svn clone w/ trunk and single branch: 1.3G
  • devstudio's trunk as single git-svn clone w/ trunk and single branch: 0.13G

So, not only is the footprint smaller, but the performance is better and I need never do a full clone (or svn checkout) again - instead, I can just copy the existing Git repo, and rebase it to a different branch. Instead of hours, this operation takes seconds (or minutes) and happens without the need for a network connection.


Okay, enough blather. Show me the code!

Check out the repo, including only the trunk & most recent branch

# Figure out the revision number based on when a branch was created, then 
# from r28571, returns -r28571:HEAD
rev=$(svn log --stop-on-copy \
  http://svn.jboss.org/repos/jbosstools/branches/jbosstools-3.2.x \
  | egrep "r[0-9]+" | tail -1 | sed -e "s#\(r[0-9]\+\).\+#-\1:HEAD#")

# now, fetch repo starting from the branch's initial commit
git svn clone -s $rev http://svn.jboss.org/repos/jbosstools jbosstools_GIT

Now you have a repo which contains trunk & a single branch

git branch -a # list local (Git) and remote (SVN) branches

  * master
    remotes/jbosstools-3.2.x
    remotes/trunk

Switch to the branch

git checkout -b local/jbosstools-3.2.x jbosstools-3.2.x # connect a new local branch to remote one

  Checking out files: 100% (609/609), done.
  Switched to a new branch 'local/jbosstools-3.2.x'

git svn info # verify now working in branch

  URL: http://svn.jboss.org/repos/jbosstools/branches/jbosstools-3.2.x
  Repository Root: http://svn.jboss.org/repos/jbosstools

Switch back to trunk

git checkout -b local/trunk trunk # connect a new local branch to remote trunk

  Switched to a new branch 'local/trunk'

git svn info # verify now working in branch

  URL: http://svn.jboss.org/repos/jbosstools/trunk
  Repository Root: http://svn.jboss.org/repos/jbosstools

Rewind your changes, pull updates from SVN repo, apply your changes; won't work if you have local uncommitted changes

git svn rebase

Fetch updates from SVN repo (ignoring local changes?)

git svn fetch

Create a new branch (remotely with SVN)

svn copy \
  http://svn.jboss.org/repos/jbosstools/branches/jbosstools-3.2.x \
  http://svn.jboss.org/repos/jbosstools/branches/some-new-branch